Sunday, February 24, 2013

Cross Stitch Wall Hanging


This cross stitch wall hanging only took me about 13 years to complete!  I can't remember exactly when I started it, but I know it was in college, probably the beginning...  I would do it for a while, and then get distracted with other things and not come back to it for a long time.  I took it with me on a few trips, most recently, our big Yellowstone vacation.  Since I only had the lower left hand corner left to do once we got home, I figured I should just finish it.  I love it, and it fits perfectly in our living room with our new couches!  I don't think I'll be starting another one anytime soon though!  What is the longest project you've ever worked on?

Thursday, February 21, 2013

Days 103-121, MFW First Grade


Wow, I didn't realize that it had been so long since I've posted about our homeschooling days!  We're cruising right along and are almost to the big 125th day!  That is where the phonics instruction stops and we just keep reading a lot to practice!  We'll also having our 100 party soon!

For our bible time, we have covered a lot of the big stories: Samson, David and Goliath, Solomon, Elijah and Elisha.  We made jewels when we talked about King Solomon because he was rich.  Above is a picture of Valentine card boxes that they made using their jewels.


Below are Caleb's bible notebook pages.  MFW is set up so that first I read them a bible story, then Caleb does a worksheet that includes some of the words that will be in his reader.  Then Caleb reads the same story in his bible reader.  Then we discuss how to summarize the story.  After thinking of a sentence or two, Caleb writes them in his bible notebook while I dictate them to him.  He does a really good job (if he's in a good mood).  He spells everything exactly as they sound, I still think it's cute.  We correct his mistakes before he draws his picture (the first picture is traced).


For math, Caleb has spent the last month focusing on addition and subtraction.  We still need to work on memorizing the math facts!  We also read a math book called The Case of the Backyard Treasure by Joanne Rocklin.  The kids loved the alphabet code in the book, so we had to write our names in code.  I think I'm going to write them each a letter this week using this code too, just for fun!


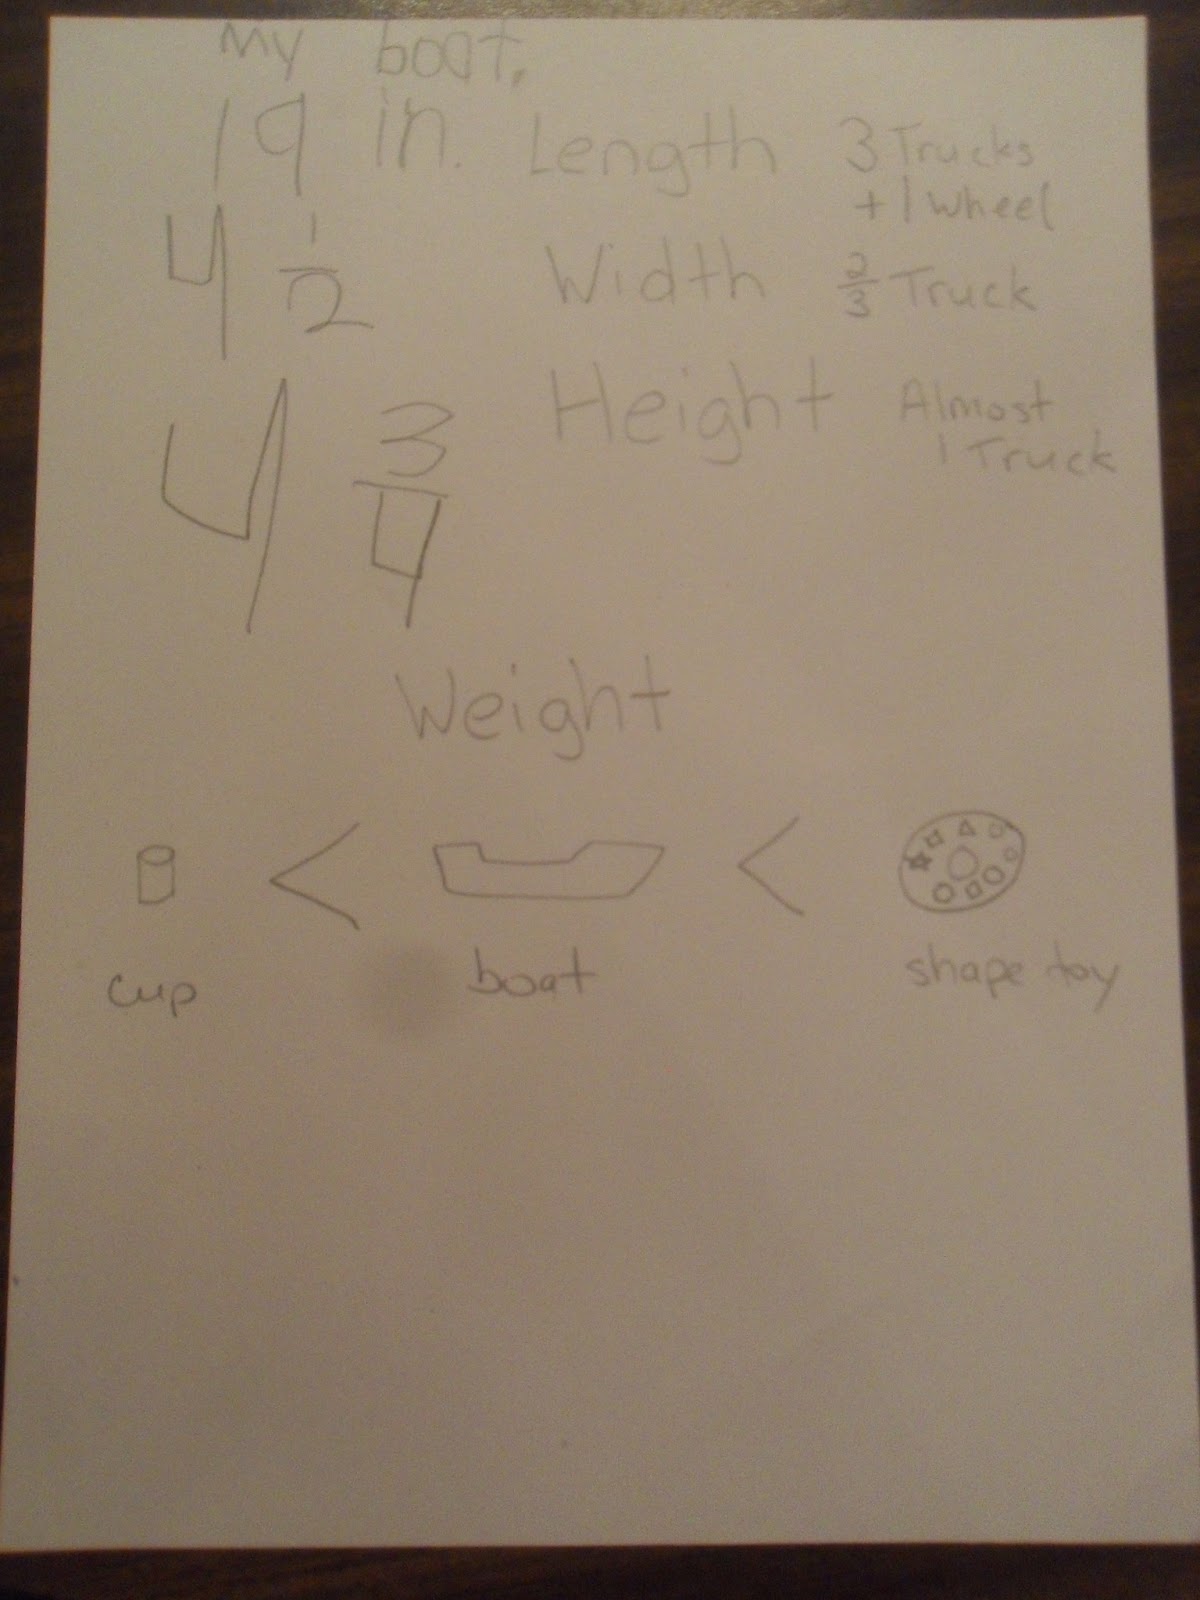
The last couple days, we moved onto measuring, so we read a book called Measuring Penny.  In the book, a girl measures her dog in lots of different ways.  I had them each pick out a toy and we measured it in several different ways.  Below is Caleb's paper about his toy boat.


This is our science book right now, we've really had fun doing all the simple experiments.  We made an awesome water wheel!  This was one of the coolest things we've done, the kids loved it!


Thanks for stopping by!

Friday, February 15, 2013

Chunky Monkey Birthday Cake


Making a monkey is not as easy as one would think!  But my son said it was awesome.  I'm sure Christian thought he tasted awesome too!  Happy Birthday buddy!


Thursday, February 14, 2013

10 Reasons I Love You Bookmarks


Happy Valentine's Day!  I made homemade bookmarks for Caleb, Rebekah, and my husband.  I wish I would have made one for Joshua with just a picture on it, he wanted one REALLY bad!  I got the idea from The Prudent Homemaker.  I also used her tassel tutorial.  I made them in Microsoft Word and then used my thermal laminater to laminate them.  You can also use contact paper on both sides.


I decided to put a picture on the back of each one.  Thank you Ashley for taking our pictures, I love having nice ones to use for projects like this.


For dinner, we had Subway at home.  Their favorite part was the chips of course!  And you can see my orange roses, thank you Kevin!

Friday, February 8, 2013

Shepherd's Bags And Heart Hangers


Many of you know that we are using My Father's World First Grade for school.  This past week (Day 107) we learned about David, so one of our activities was to make shepherd's bags.  The curriculum didn't have directions on how to make them, so I'm going to try and tell you how I did it.  These were so simple, they only took 5 minutes each!


First, I let them each pick a fabric and ribbon from my stash.  We cut a piece about 16 x 8 inches.  Fold it in half, right sides together.  With the fold on the bottom, sew up each side, you now should have a bag, turn it right side out.  To make the casing for the ribbon, fold the raw edge down about 1 inch, so the raw edge is on the inside of the bag, and sew completely around the bag.  Then sew another line about 1/2 inch above the one you just sewed.   The two lines should be far enough apart that your ribbon fits between them.  You should now have a bag with a finished edge, that has two lines sewn around the top.  Very carefully, use a seam ripper or scissors to cut a small slit between the two lines (should be perpendicular to the seams).  Thread the ribbon through (put a safety pin on one end to make threading easy), then just tie the ribbon in a knot.  That's it!  I hope that makes sense (see picture below), feel free to leave a comment or email me with a question.


Remember the sewing kits I made my kids for Christmas?  Well, they actually completed their first project using a real needle (you know the sharp kind!).  They both did a great job, and no one screamed because they got poked!

Thursday, February 7, 2013

Fleece Teddy Bear and Tote


This wonky little teddy bear is going to be a gift for a three year old boy.  I also made him a tote to put his bear in.  I have made lots of totes before, take a look at this one, and then try to make your own!  I attempted to make a little coat and hat for the bear out of the fireman hat fabric, but they didn't turn out good...


To make the bear, I just drew a bear on a piece of poster board, not including the ears.  I cut it out while the paper was folded in half so that it would be symmetrical (apparently my sewing wasn't as symmetrical as my cutting!).  I cut two pieces out of red fleece, then cut 4 pieces for the ear.  I sewed two pieces together for each ear, then turned them right side out.  Then I put the eyes and nose on, and also embroidered the mouth.  Once that was done, I made the bear sandwich: both large pieces right sides together, with the ears sandwiched in between, with the raw edges together.  Then I sewed it up, leaving a hole.  After turning it right side out, I filled it with stuffing and closed the hole.  He's a little wonky, but I hope a 3 year old will love him anyway!


Related Posts Plugin for WordPress, Blogger...